 I’ve tried frequent waterer swapping, the lightbulb waterer, and a solar tire, but this solar waterer is the best design yet for my needs. In part 1 I talked about the concept and design, this post actually included my 2nd update about using plastic to shield the insulation from pecking. So this is my 3rd and possibly the last, update on this water.
When I put the waterer out this year, I was pleased to see the older chickens remembered what it was and taught the new ones; thus, bypassing needing to do any training.
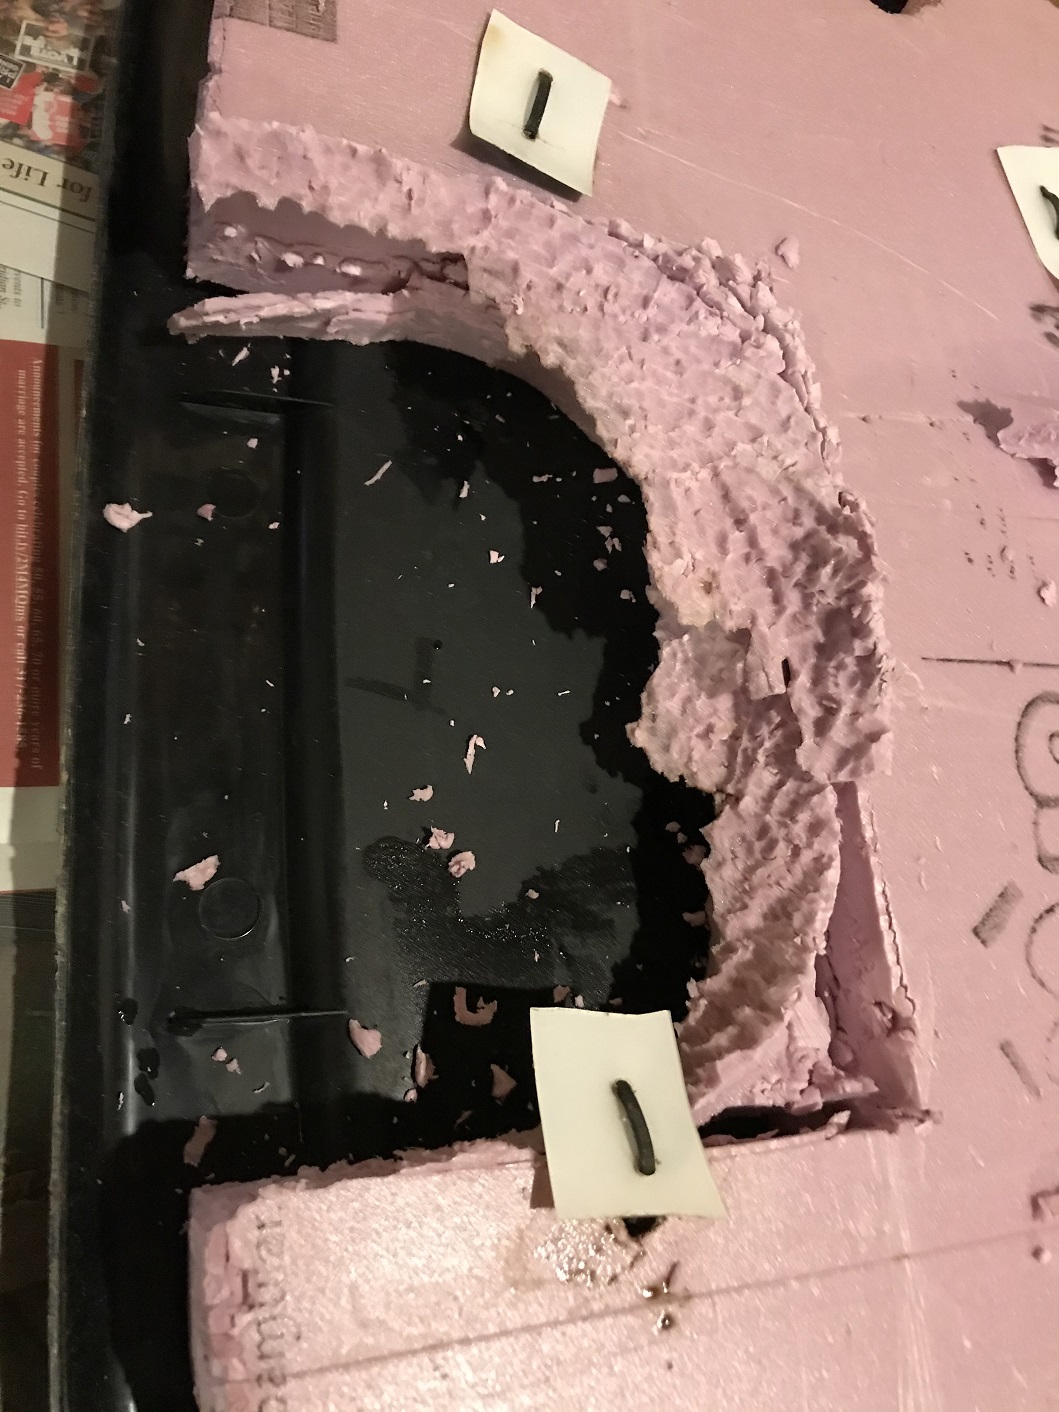
However, I underestimated the destructive power of chickens and they had pecked all the insulation off of the lid directly over where they stick their head in. This suprised me. Basically the chickens are sticking their head in a hole roughly the size of an elongated baseball. Then looking up and pecking the top in the small cavity I left open.
So to fix it, I cut a new piece of insulation, then cut the lid to match it as best I could. Of course duct tape was used to cover the seams for additional measure.
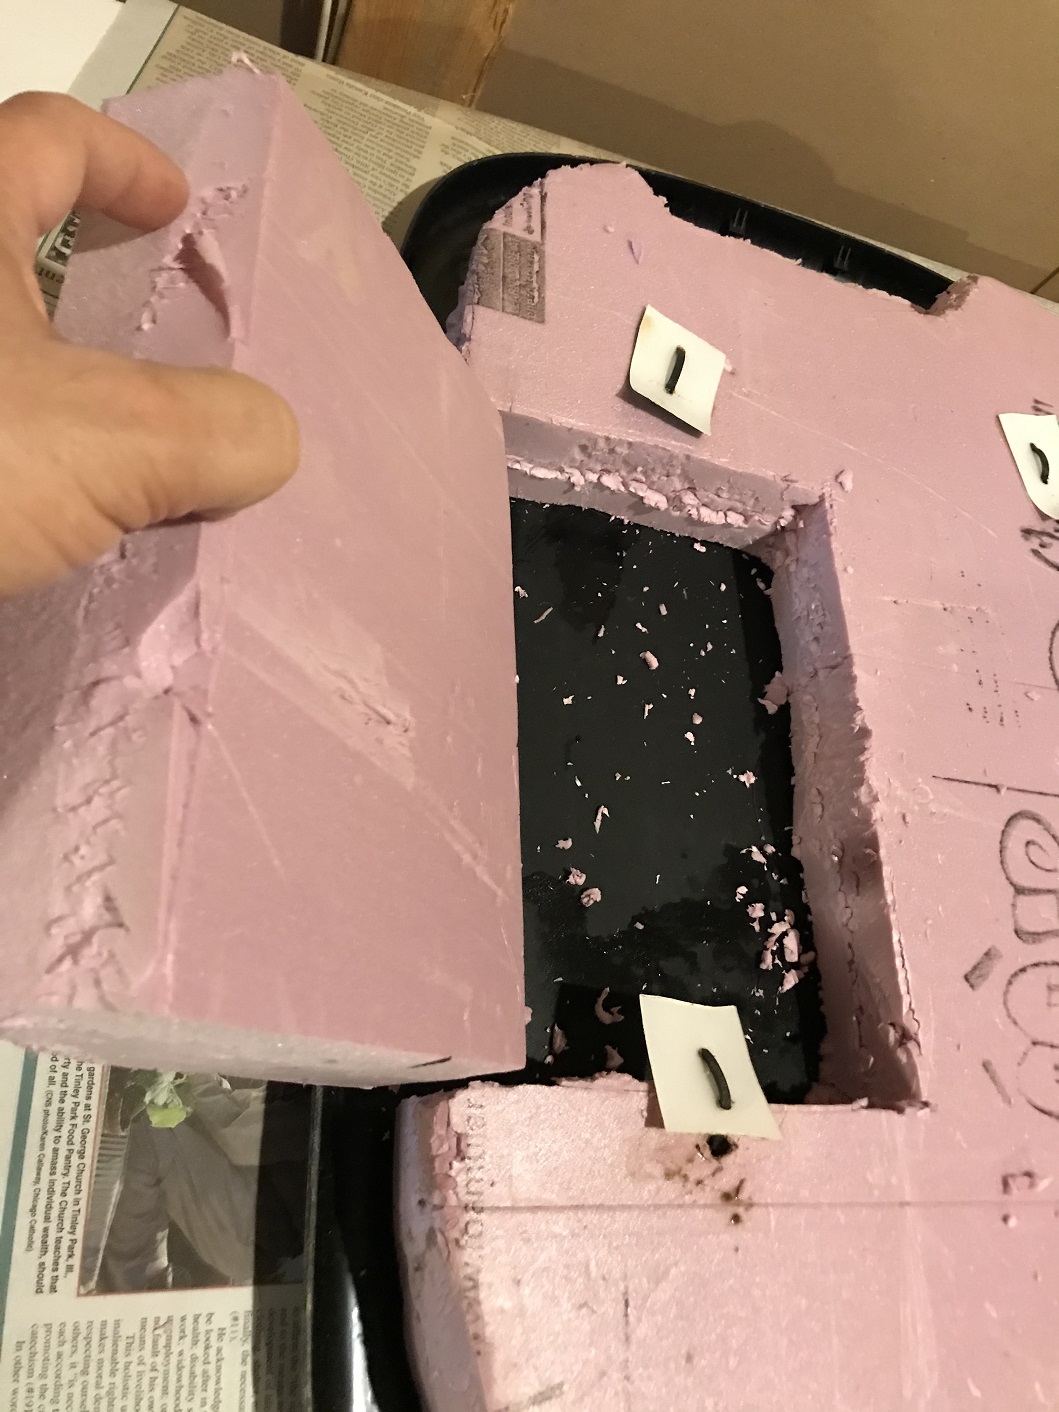
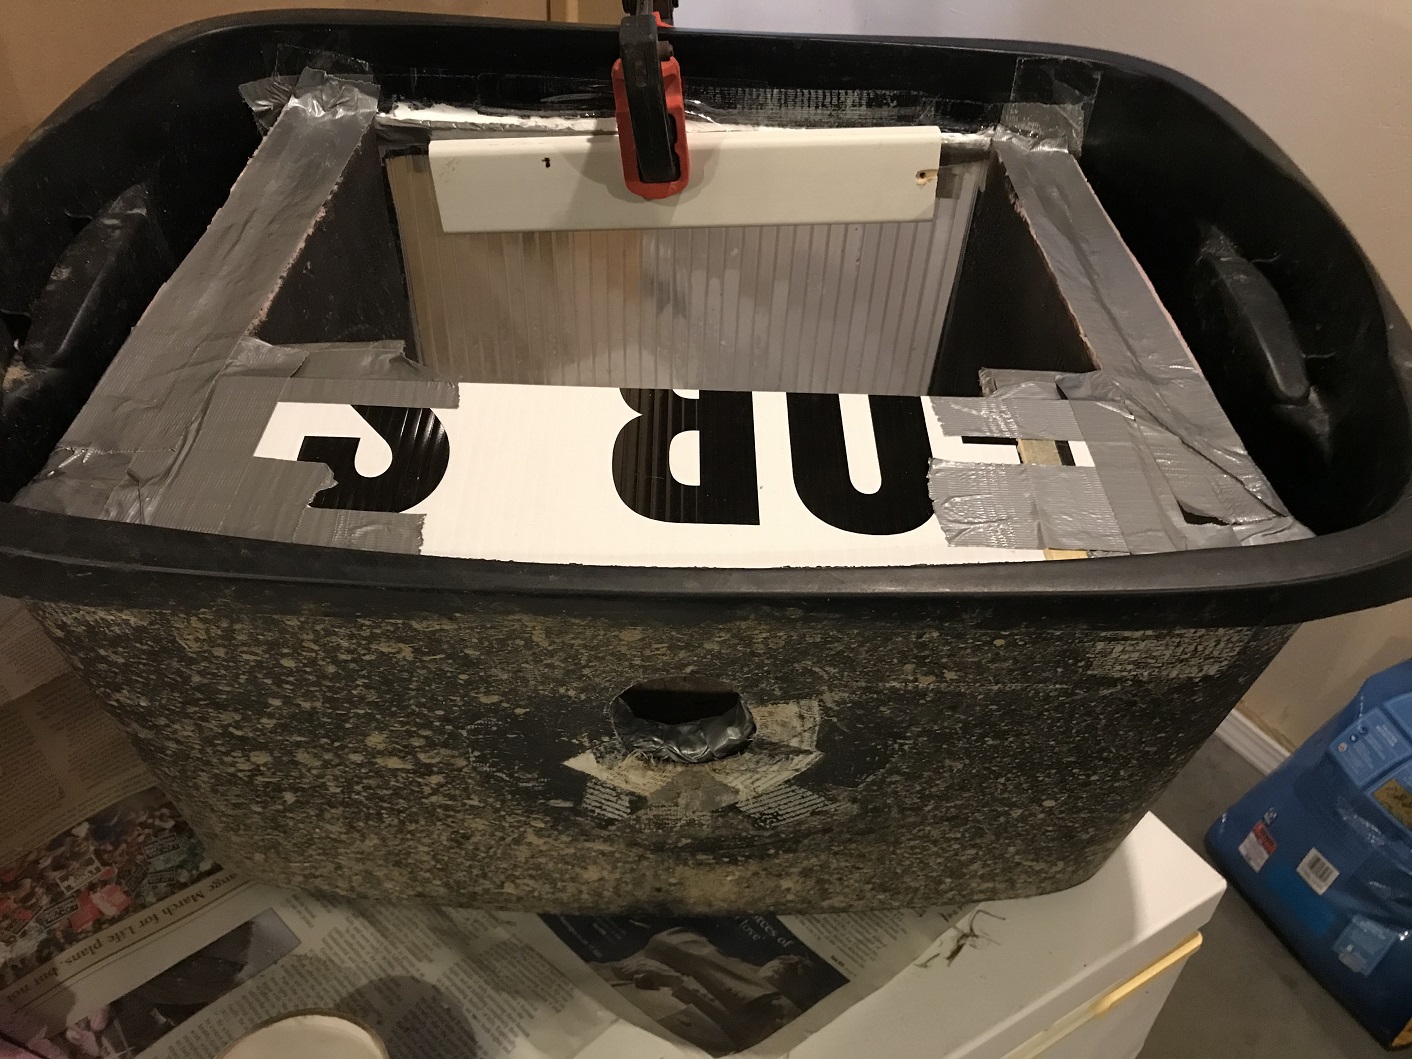
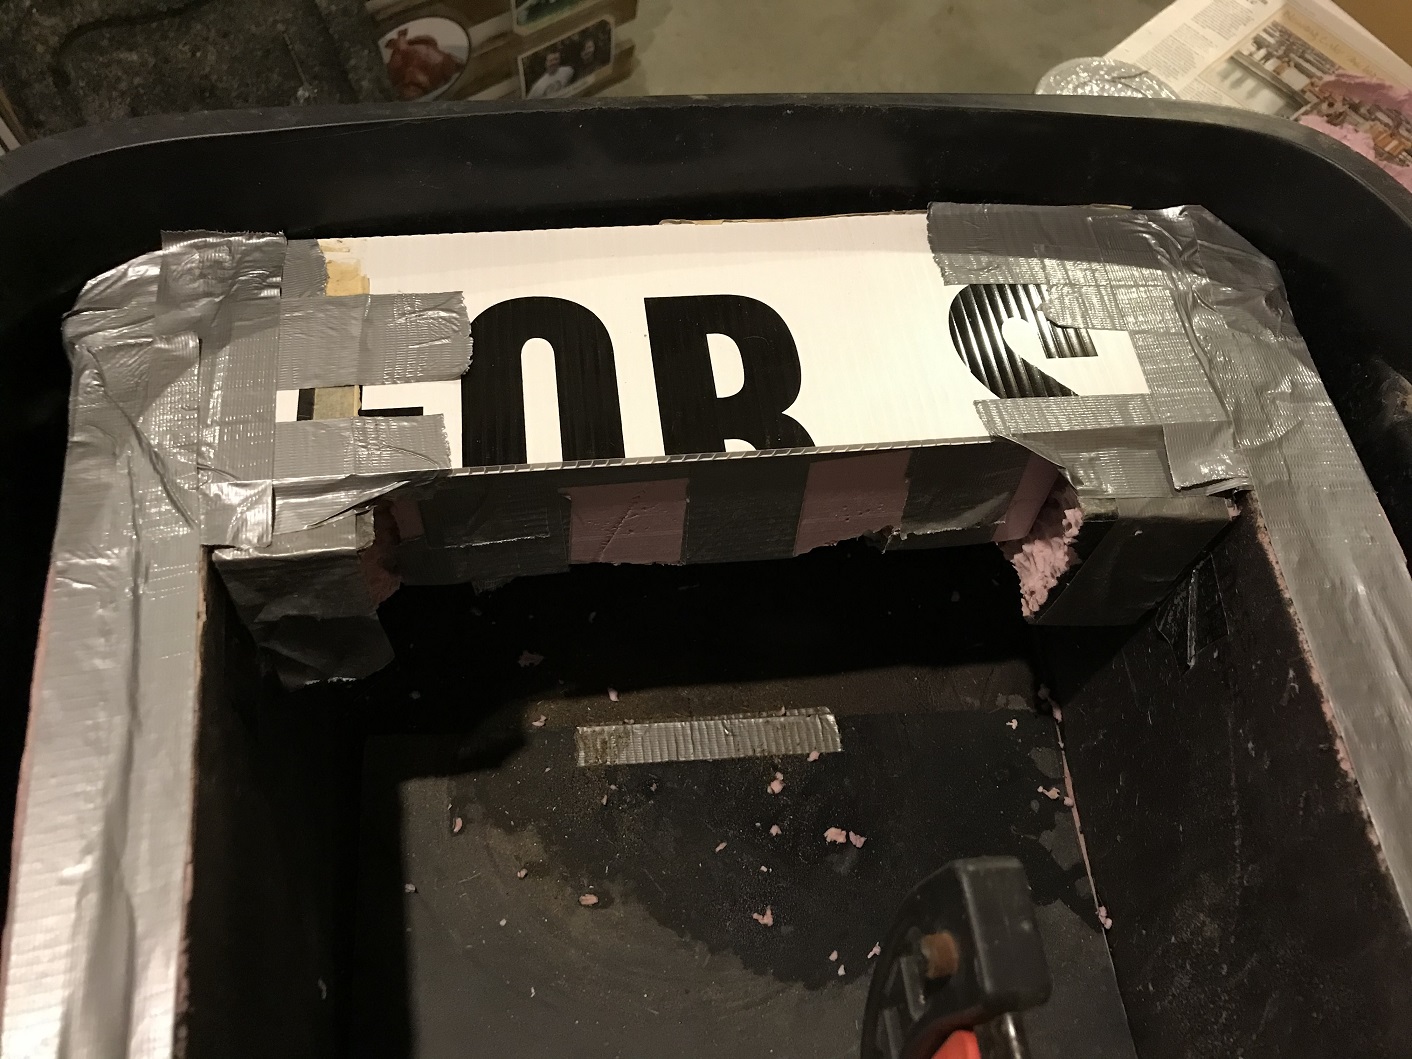 Then I cut a new piece of corrugated plastic from my ‘For Sale’ sign I’ve been using and placed it on top of the cavity where the chicken put their head into. I had to trim some of the side insulation pieces to recess the plastic so the lid would sit properly.
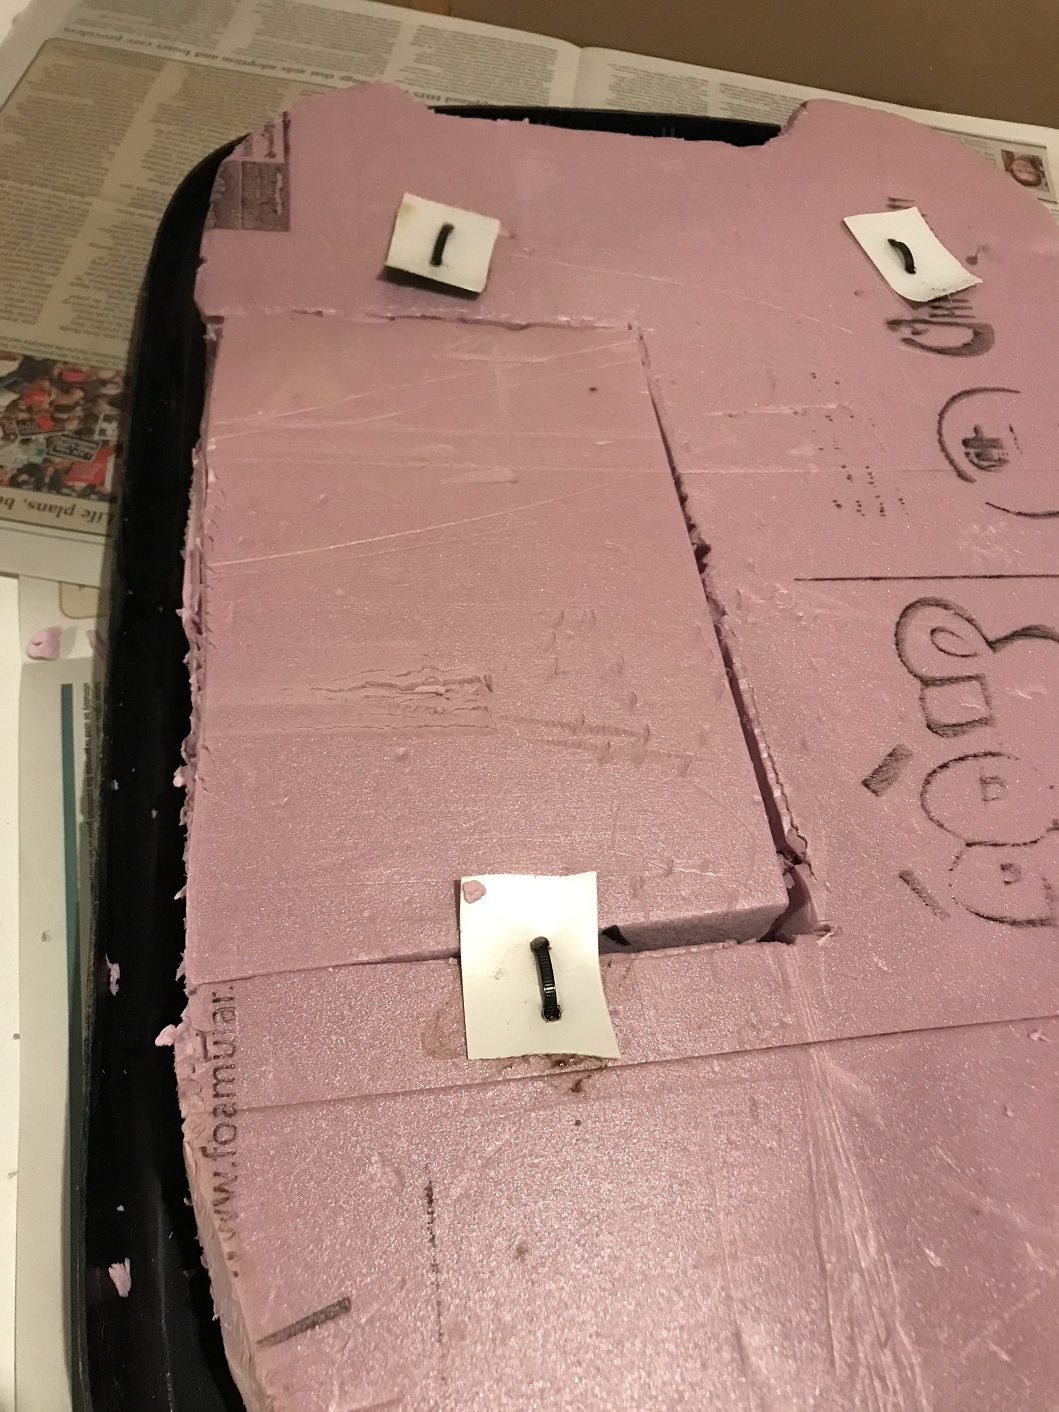
 The chickens have also been pecking the top of the insulation every time we lift the lid to add water and big sections in the corner are now gone. Amazing what a few pecks a day over a couple months adds up to. So I fixed the corners. Then for good measure, I covered the top of all the insulation with duct tape to help prevent further pecking.

Also, the duct tape around the entry hole keeps coming loose on the outside. I’ve fixed it multiple times, but it just doesn’t stick for long. The main purpose of this tape is to prevent the chickens from pecking the insulation on the inside of the tub, so I removed the inside insulation, as one big conglomeration, since it’s all taped together but not taped to the sides or bottom. Then I put the tape on just the insulation, where it seems to stick the best.
 Finally, when I pulled the inside insulation “cluster/conglomeration” out, it was a perfect opportunity to use come caulking to seal in the Twinwall Polycarbonat. I previously used tape, but it was coming lose and given how well the waterer is working, I figured it was time to do something a little more permanent by adding a bead of calking to the inside perimeter of the window.
As mentioned in the first post, the water inside will still freeze, especially at night, that’s not the goal. The goal is to keep the water from freezing in order to give the chickens an extended period of drinking time. If it’s sunny, the temperature can drop in the mid 20’s at night and 32 during the day and the sun will melt the water that froze overnight in a couple hours in the morning.
We’re looking at weather in the teens and below zero in the coming weeks. That means we’ll need to go out and dump the frozen water, which is why I use a rubber bowl. When we replace it with warm water, if it’s sunny I don’t expect it to freeze for the rest of the daylight hours, even at those temperatures. If it’s cloudy, we’ll check it and maybe need to refresh with warm water later in the day.
