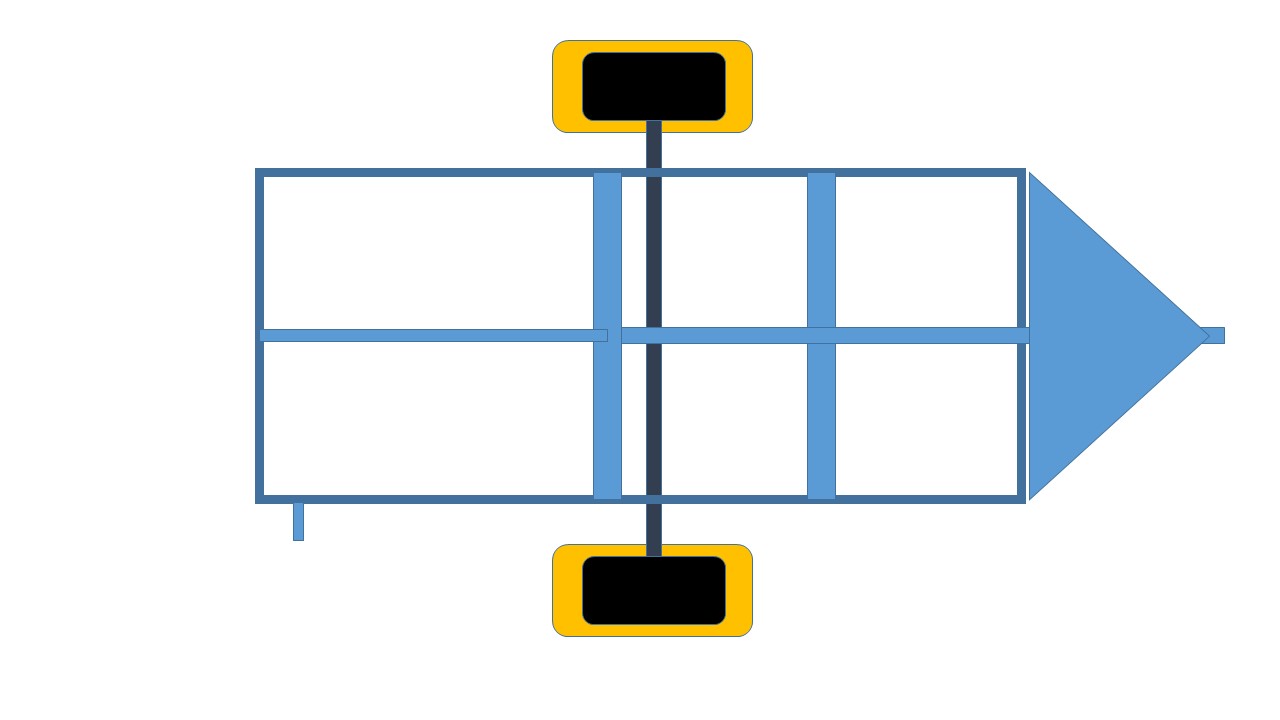
Tires

 Several years ago, I said this build has been on my mind for a while, I decided a coop on a trailer should be low to the ground. Honestly don’t remember why I thought this at the time, but I shared the idea I had for making tires shorter with my father-in-law. He wasn’t so much interested in the lower trailer, but was very interested in tires that won’t go flat.
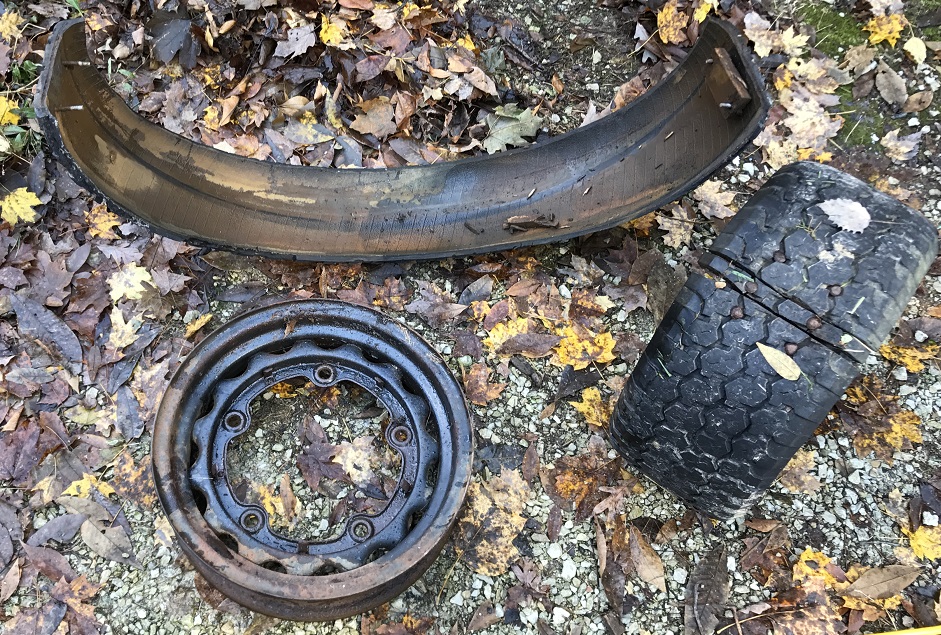 So the trailer’s tires he gifted me had been modified for about 2 years. I give thanks again to my father-in-law not only for all the parts he donated to this project, but for making my job easier. He already cut the sidewalls off the tires, shortened the remaining tread, and bolted the ends to the rim. In addition to all this work, the passing of time and trailer use identified a couple areas that needed improvements.
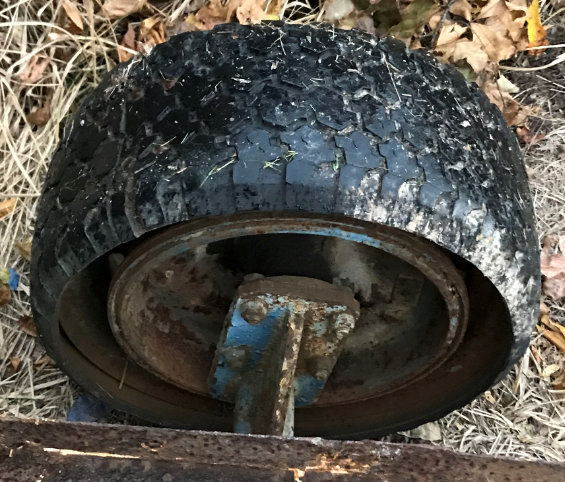
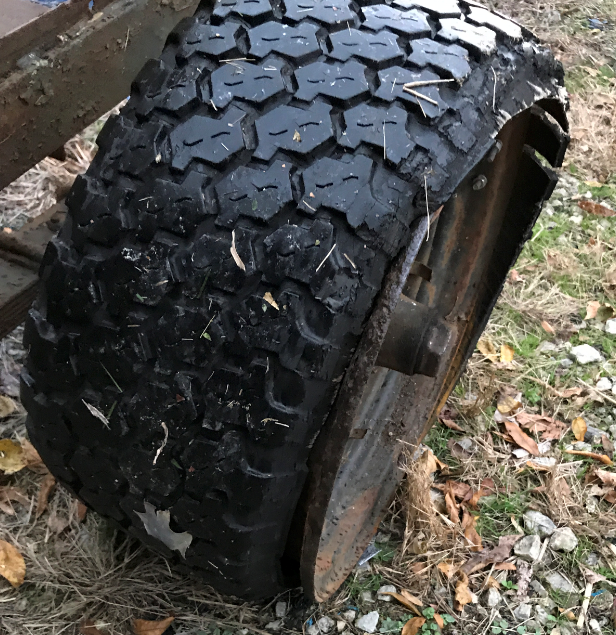 Initially he only bolted the cut tires to the rim in one spot, where the rubber ends met. A miscalculated in the circumference resulted in the tread being cut too short, hence the extra ad-on pieces you’ll see in the pictures. The rubber was stretched tight and the edges curved around the rim, so it seemed like the rubber would not drift. In this picture you see it did drift off the rim. I added 2 additional fastening points approximately every 120 degrees.

 Second, where it was bolted wood pieces were used as spacers. These rotted and fell apart. I decided to used foaming insulation instead and becasue I was adding additional bolts, I did it completely around the wheel.
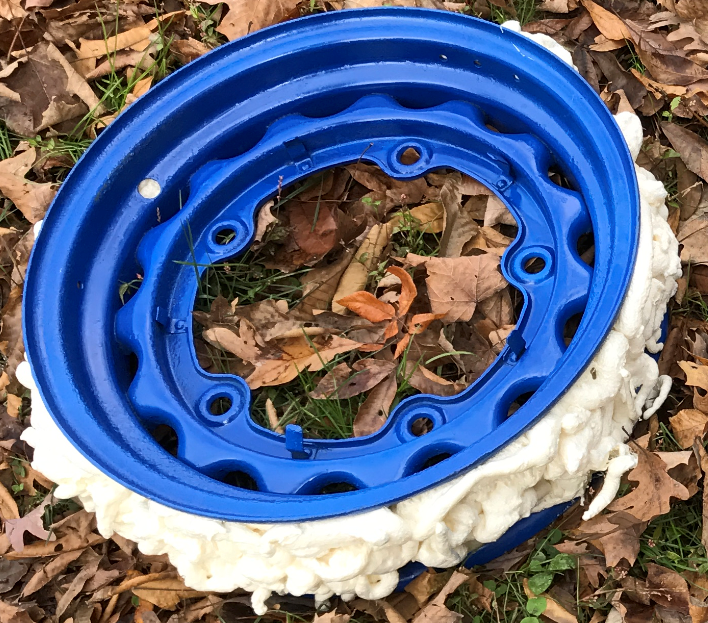 Lastly, the rotted wood pointed out that the cupped rubber on the wheel was holding water. Standing water is not good for the metal rim to sit in. This I haven’t mitigated yet, but the plan is to cut some holes in the rubber to allow for drainage, and have awnings over the tiers so they don’t get as much rain to begin with. I overhung the roof in the back to do this, and in the front, I’ll add an awning that will double as an extension for water nipple.
Roof
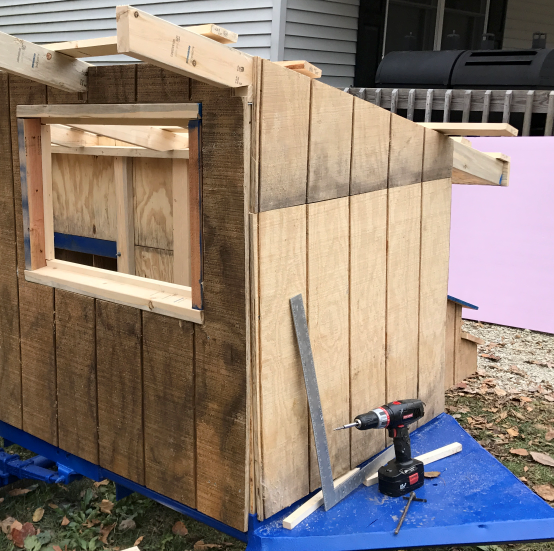
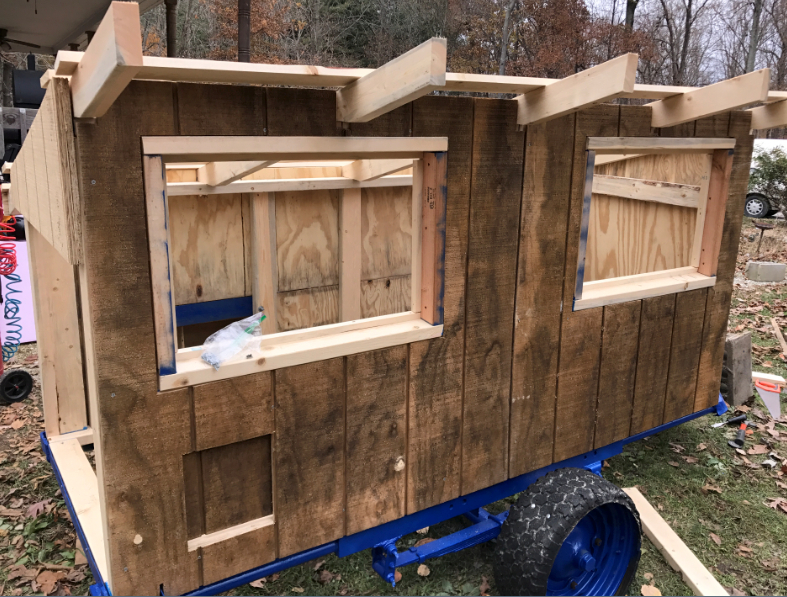
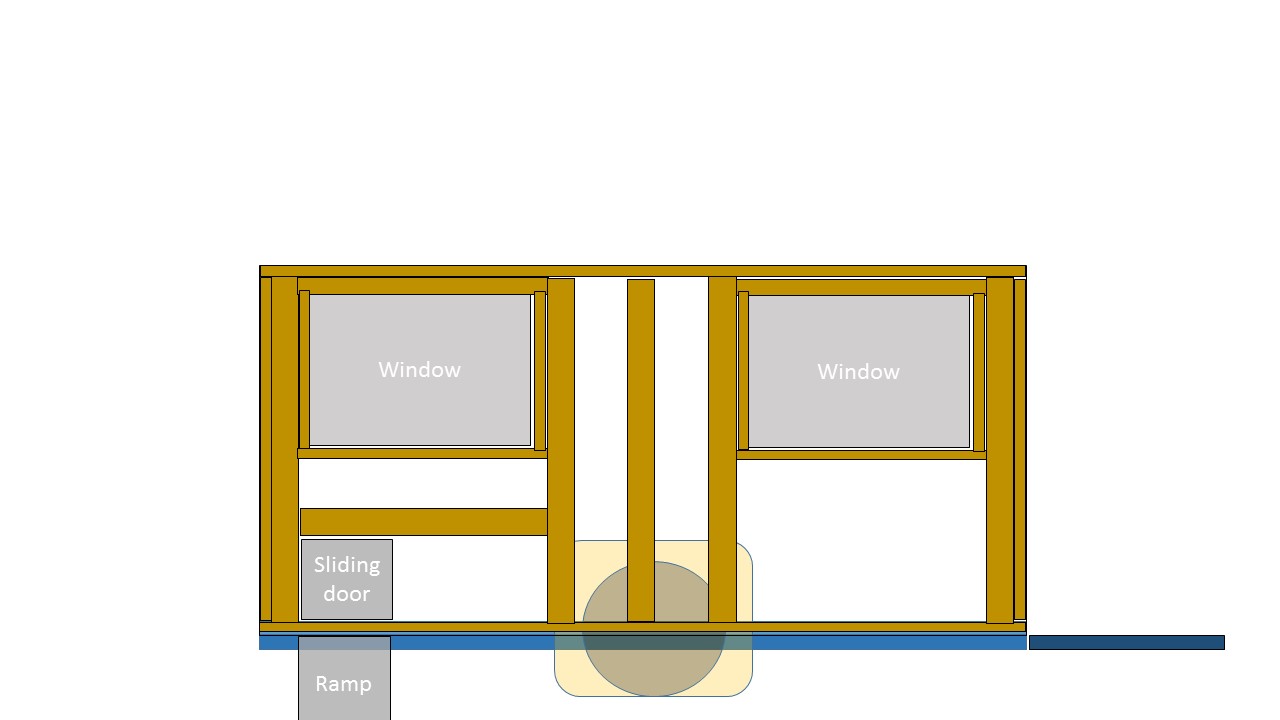
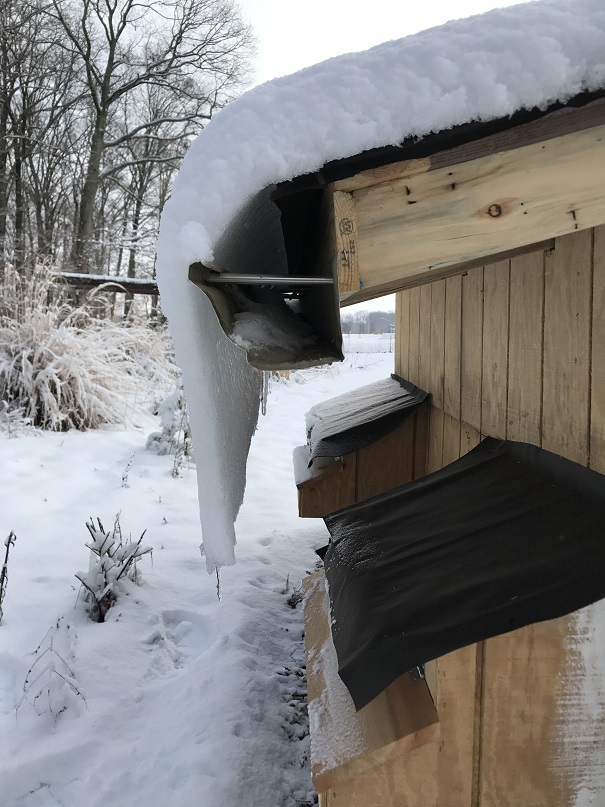 I wanted the roof to overhang in the front and back. The backside covers the wheel and the nesting boxes. I added a gutter for additional overhang to divert the rain away from the nesting boxes and for potential for rain catchment later. As you can see in the picture, the additional length comes in handy in the winter.
 The front overhang is to shade the windows in the summer, when the sun is high overhead. During the cooler/cold seasons when the sun is lower in the sky, it will still shine into the coop for additional passive solar heat. The overhang also helps with the pulleys for the aviary and to keep the rain off the windows and wheel.
 I added a layer of foam board under the roof for insulation. I’m not concerned with sealing the coop tight, but I wanted more than a thin roof between the hot sun in the summer and cold in the winter.
Due to timing and budget, I started out with some used scrap roofing I picked up fee for projects. What I had left was in pretty bad shape and I only intended it to make it through the winter before I replace it with a metal roof. It didn’t.
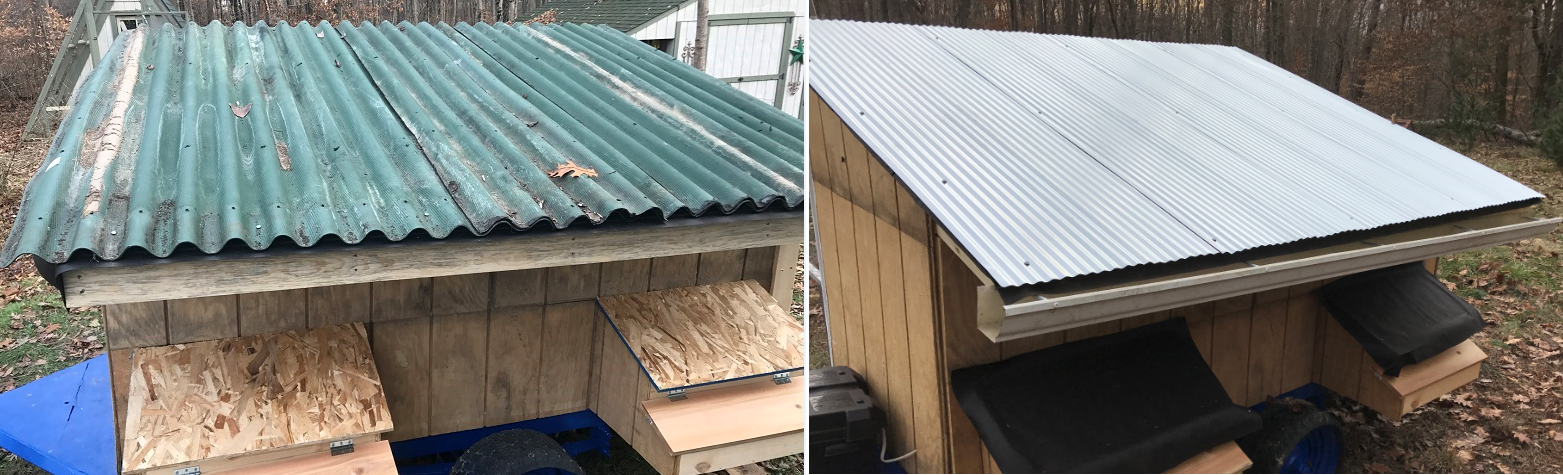 Fortunately the high winds that blew off the first roof were from a warm front. This at least providing me with a some above freezing temperatures as I replaced it with a metal roof. I was going to special order a blue metal roof to coordinate with the blue frame, but when you need it today, you take what’s in stock at the hardware store.
Color
The final basic item for the build is the color. Everything I’ve built since we move out here has been grey with green roof and trim. This matches the house. But as I mentioned, the trailer frame was previously blue and nearly screamed at me to be blue again. Additionally, I didn’t have any grey stain on hand and had already spent more than my budget for the first phase of this project.
 As I was fretting over the color change, I happened to watch this double-decker bus conversion video and at 12:10 the interviewer says “It’s green!” and the builder’s reply was “It was going to be blue, but now it’s green”, basically because he’s made due. I have white stain and white and blue go great together, so it was going to be grey, but now it’ll be white.
Additionally a white coop makes me think of it as a symbol of Captain Ahab’s white whale. In the last several years, chickens have certainly been my “white whale”. I’ve also nicknamed the coop the Pequod. Not sure it’s going to stick, but I tried.
Finally, It goes against my upbringing to build without properly protecting the wood with stain, but I was limited by time and warm weather. I settled for staining the trim and pieces that were going to overlap, so I wouldn’t have to take them apart later. Hence why I went with white and why you see some white stripes on the ends.