Turkeys – 2017


They’re Here…


Our turkeys are ready.  These are the same quality poultry as our chickens, affectionately raised on pasture using non-GMO feed.  We only raised a handful as a trial, so our supply is limited.  Get yours to add a special touch to your special occasion.

Price is $4/lb.  Weights are 12-20 lbs. Turkeys are frozen.  Order by contacting us at brothersM.poultry@gmail.com or through our order page .


Blackberries

Blackberries are my favorite berry.  I love them freshly picked, in pies or cobblers, as jam, and as wine.  I probably prefer the taste of strawberries slightly over blackberries, but when you factor in growing and picking, blackberries win as my favorite.

Blackberries are aggressive and will take over whatever area you plant them in, crowding out the weeds.   They love and fruit best in full sun, but adapt to partial to near full shade.  They also do not seem to be picky about the soil.   This makes them easy to grow and is what edges them above strawberries.

Nearly every place a vine touches the ground, it makes a new plant. This picture is where a new plant started from the end of a vine. This means that you can start out with a few plants and in a few years have whole row and in a few more be nearly overrun by the things and start giving them away to friends and family.  This is how I got my start, from a friend, who got his start from his parents, who got theirs from a coworker, and so on.

The ones I grow are an improved thorn-less variety.  I do not know the actual name, but I don’t think there are that many different ones out there. Not only are they easier to pick without the thorns, but the berries are much larger than your wild berries.  We have both these and wild berries on the property.

Another thing they are good for is pest control for grapes. Planting blackberries in proximity to grapes is a natural way to reduce bugs that would eat your grapes.  Growers have noted that the blackberries attract the bugs first and are hearty enough that the pest are no real threat.  This gives the predator bugs time to hatch and start eating the bad bugs and keep them off  your grape plants.

I’m very happy to finally have a good row growing again; I’ve missed them since we moved.  I put this section of the fence up first just so I could get a start on the berries.  This picture shows the end of my current 50′ row of blackberries. Eventually they will continue on down whole fence, except for a few grape plants on either end.  That’ll be about 150′ worth of blackberries, yum.

-Jason

Dual-purpose Chickens – 10 – Moving the coop update

In fall of 2014 I decided I wanted to raise some dual-purpose chickens.  My focus is on a breed that lays good eggs which can be incubated to raise “panfry” broilers, pre-Cornish-Cross size meat birds.  So how about an update on how I move the coop.


I tried to keep the size of the coop minimal so that it could be easily moved.  It’s still heavy and challenging to move.  My initial thought was to add permanent retractable wheels to one end and add some sort of a trailer type tongue to the other end for lifting an pulling.  Due to the weight, the tongue never happened.  Instead I still used the retractable wheels, but also put a sledge under the opposite “tongue” end and pulled it like a sled.


This wasn’t optimal.  The coop was too heavy for the retracting mechanism I made for the wheels.  It was also hard to lift the coop to put the sledge under the other end to drag it with.  Additionally, in the spring I had to use the tractor to move it because the garden tractor would get stuck, #1 The Coop.

So  I scrapped the contraption I made for the extendable wheels and  decided to use temporarily attached wheels instead.  I scavenged two more wheels from  the front of a dead riding lawn mower.  For axils, I use 8″ bolts that are the same diameter as the original wheel axils.  I drilled holes through the coop’s 4×4 bottom frame and just slide the wheels and bolds right on.  I added some spacers between the wheel and wood to prevent rubbing.

This works well.  Our winter area can get mucky, as you can probably tell by the picture to the right; however, the wheels still allow us to pull/push the coop by hand.  A small scrap piece of  chain added to one end helps us to pull or allows us to use the garden tractor for longer distance hauls.


The main downside of this method is that it requires at least two people to tip the coop and put the wheels on.  You could use a lever or jack to raise each side, but since I have two boys, it takes just a few minutes to tip the coop each way and add the wheels.

-Jason

Big Dreams

I had big dreams; I still do.  When we moved out to the country 3-4 years ago, I had lots of plans, most centered around pemaculture.  If you followed my FB posts back then, you saw lots of swales, hundreds of trees and bushes, and lot of other “gardening” things.  Well priorities happened and several of the projects I started have been left to the wild.

This year I’m taking some of them back.  Not that I really have any extra time, but it was looking like this was the pivotal year for either doing something or losing the effort and money I previously invested in them.

Here’s the brush pile from the projects I’m reclaiming.   It’s 6′ tall in this picture and I added a couple more feet after that.

And here are the projects that I’m reclaiming.


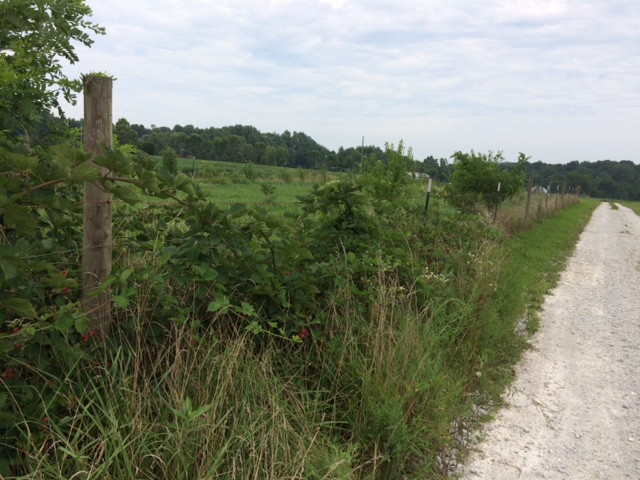
#1 is my Kiwi vines.  During our year of house building, this area was a nursery for all the plants I brought with us.   I had it fenced in to keep deer out and the kiwis intertwined in the fence.  Luckily I planted the plants far enough apart that this year I turned it into an arbor using sections of the fence.  When I cleared out the overgrowth, I kept the decorative grasses still there from the nursery and I even found the third kiwi plant that I though was lost.  So I still have my male and two female vines.


#2 is the frog pond with the honeyberry swale.  There are 5 honeyberry bushes I’m reclaiming as well as comfrey plants and some hostas.  Still have some work, but the thorn bushes are out now.


#3 is just where I had a pile of about 15 logs.  The boys helped me cut, split, and stack all the logs.  There were quite a few volunteer trees growing here between the logs, some almost 16′ tall.   As soon as we clear up the junk logs and scraps, I’ll be able to mow this area and get it ready as pasture for the laying hens.


I didn’t get completely finished tonight.  I had to stop due to loss of light and injury.   This thorn doesn’t look like much, but trust me, it really hurts to move your knuckle when there’s a thorn stuck in it.  It’s still sore as I type.

Looking forward to the bonfire tomorrow when I get rid of this brush pile.

-Jason


Dual-purpose Chickens – 9 – Suplemental Light

In fall of 2014 I decided I wanted to raise some dual-purpose chickens.  My focus is on a breed that lays good eggs which can be incubated to raise “panfry” broilers, pre-Cornish-Cross size meat birds.  So, how do I provide supplemental light for consistent laying?


The 3 breeds I’ve raised so far,  Buff Orpingtons, Delaware, and Rainbows, are sensitive to the amount of “daylight” they get in relation to egg laying.  In the seasons when the days are shorter, they stop laying.  I’ve heard some breeds are not as sensitive and will keep laying, but these breeds slowed down and almost stopped on me before I added light to extend their “day”.


120Since I do want year round laying, I have to supplement the daylight with artificial light.   When the coop is near an electrical outlet, it’s easy enough to use a standard multi-time timer to power a CFL bulb in the coop.  However, we normally only bring the coop near an outlet in the cold part of winter and the birds still need supplemental light in the fall and spring when no outlets are near the coop.


toteTo solve this, I built a DC light box.  For the light,  I ordered a 12VDC LED bulb that plugs into a standard receptacle.  I took the plug off a hanging lamp and stripped the wires to attach them to unit.  I purchased a $10 DC timer that has 16 programmable on/off times.  And I alternate deep cycle batteries for the power supply.


I followed the instructions to hook up the timer; however, the switch on the timer wouldn’t handle the amperage of the light if I ran it through the timer switch.  So instead, I ran a car relay off the timer switch and wired the light through the relay.  I added a fuse in as well, mainly because I already had the female spade connector cramped on and also wanted an easy disconnect in that spot anyway.  It may not be pretty, but it works.


lightTo run the light into the coop, I disconnect the lamp wire and feed it through a hole I drilled in the coop and another hole in plastic tote that houses all the electronics.

This setup works pretty good.  I have two light cycles programed, one in the morning and another one at night.   I can get at least 5 days off one battery charge running 4-6 hours of light a day.  Below are the descriptions and links to the bulbs and timer I used for your reference.

-Jason


(Pack of 2) 5w E26 LED Bulbs, 12 Volt, Warm White, Round Shape, 40w Equivalent, Solar Powered LED Bulbs, Off Grid LED Bulbs

FAVOLCANO CN101 DC 12V 16A Digital LCD Power Programmable Timer Time Switch Relay

2017 Season… It’s here

It’s Here!
We are officially kicking off our 2017 season. We will have frozen chickens available starting May 27; CSAs will have an opportunity to pickup fresh chickens the previous Saturday. Below are some of the highlights. Visit our Pricing Page for more details.

Pricing for 2017
• $4.00/lb for whole frozen chickens.
○ Average weight 4-5 lbs
• CSA packages – Our best offer
○ Ends May 1st or when all our CSA slots are full.
• Bulk purchase discounts
○ 5 chickens = 4%
○ 10 chickens = 6%
○ 15 chickens = 8%
○ 20 chickens = 10%

We’ll primarily be selling through the Farmers Markets
• Seymour Farmers Market – Saturdays, May 27 – until sold out for 2017
•• Westport Farmers Market – TBD for 2017

Why did we do a separate CSA and bulk discount?

It all comes down to what is Community Supported Agriculture(CSA). Last year was the first year for our CSA and we ended up giving our CSA pricing to everyone wanting to place bulk orders. We did this because we didn’t have a bulk discount. It was a compromise, but I knew this year we needed to change it in order to get back to the true CSA spirt.

The spirit of CSA is not about the discount. CSA is about supporting local agriculture because you realize the value of locally grown food, believe in supporting community businesses, or you want to support someone growing high quality food. While the reasons are your own, it really boils down to you supporting a cause. And one I think is a good one, if I didn’t we wouldn’t be doing this.

We value our CSA relationships. Your commitment helps shoulder our burden and tells us that what we do matters. It’s hard to explain how much that means to us, but we’ve tried to express it by returning to our CSA supporters the best value we can.

We’re looking forward to a great year and each of you are the ones who help make it happen. We hope you like and share our posts and if you’re buying chicken to give us the chance to earn your loyalty. Thank you.

2017 season …almost

The 2017 season is upon us and we’ll be announcing the schedule and pricing in the next couple days!

We’ve enjoyed some downtime over the winter, especially the holidays, and we hope you enjoyed them too.  It’s going to be a busy year for our family including the long awaited Boy Scout Jamboree, which is why we’re selling chickens.

Before we officially announce the 2017 season, we’re finalizing the schedule and updating our offerings.  I can tell you now that our base price of $4/lb. will not be increased; however, we are adding some options.

In the mean time, I’ve posted a new blog on Dual-purpose Chickens.  There will be more of these to come.

We thank everyone for all your past support and look forward to a great season.

Dual-purpose Chickens – 8 – Winter Water

In fall of 2014 I decided I wanted to raise some dual-purpose chickens.  My focus is on a breed that lays good eggs which can be incubated to raise “panfry” broilers, pre-Cornish-Cross size meat birds.  So, how do I keep the water from freezing?

One of banes of winter is frozen livestock water.  In the past, we’ve use 3 plastic 1 gallon waterers and rotated them throughout the day, bringing the frozen  ones in to thaw.  This was not an optimal solution.


I did some searching and was intrigued by an idea of using a tire to accumulate solar heat, and straw and a board inside the tire as insulation.  However, that would not work around here once the temperatures dropped well below freezing.


The idea I settled on was to use a concrete block with a light bulb inside, especially since the coop was going to be close to a power source.  It was easy to make.  Just an extension cord, a plugin light receptacle, a cooking tin, and a concrete block.  Put the cord, receptacle , and light bulb together and slid them into the concrete block.

base    light

To keep the block sitting level, either chisel a grove in the concrete block or sit the block on two pieces of wood and run the cord in-between the two pieced of wood.

Grove

And cover with a tin pan, to keep moisture away from the light.  Although I have metal waterers, I’m using the plastic ones as I think they handle the water freezing better.

waterer

I’m using a 60W bulb an it has worked pretty good.   So far this year,  most days stayed above 20 degrees , but  a few days were close to zero.  These days produced some frozen “rings” higher up in the waterer;  however, the tray stayed unfrozen and the chickens had unfrozen water to drink.    One thing to watch out for is that when the water gets close to being out, the waterer is lighter and easy to knocked off.

-Jason