Brothers M. Mondays – A new post each Monday until the 2018 market season starts on 5/26.
We recycle at our house and in the past have reused our plastic bags for Brothers M. Poultry. With the increasing awareness of waste plastic polluting the environment, we’re switching to paper bags made from recycled material. They look nice and are better for the environment. Get one free with every chicken purchase.
Brothers M. Mondays – A new post each Monday until the 2018 market season starts on 5/26.
Pasturing is an important part of producing such high quality, good tasking chicken. We get them onto pasture as early is safe for the chickens to maximize their naturally grown experience. Enjoy the video of the kids moving the chickens from the brooder into the pasture.
Brothers M. Mondays – A new post each Monday until the 2018 market season starts on 5/26.
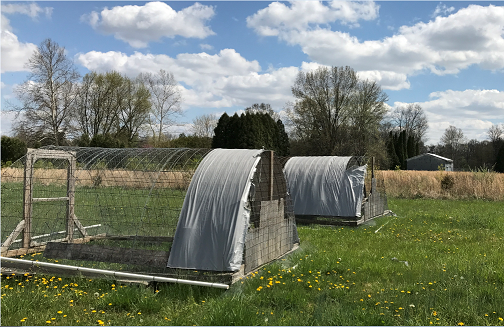
Each year the chicken tractor tarps need to be replaced. These are an important part of the tractor providing shelter from rain and storms as well as shade. Therefore they need to be in good shape each year.
Brothers M. Mondays – A new post each Monday until the 2018 market season starts on 5/26.
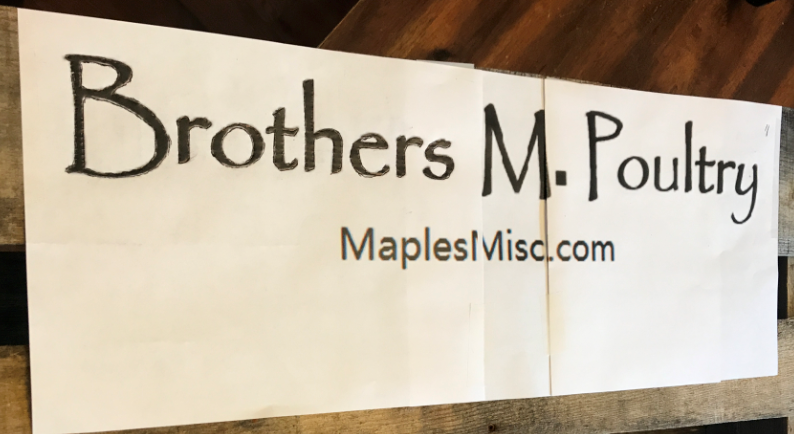
We needed new signs for the farmers markets. Samantha offered her talents to help with the creation. She likes painting and does a good job, so filling in the tracing lines was a snap for her.
The signs are made of recycled pallet wood. They feature a rope handle and space in the middle to carry most of our farmers market materials.
We used a home made carbon paper method to transfer the outline to the boards for painting. Basically cover the back side with pencil graphite then traced real hard.
Last year I had to add detail to my parts list, which lead me to create the below outline and part list. If you’re familiar with carpentry, you should be able to take this blog and build a very sturdy and versatile chicken tractor. Add this post to the basic diagrams in my earlier two posts, part 1 and part 2, and enjoy.
That’s not all. This outline inspired me to write a 75+ page step by step how-to guide with illustrations, additional information, and personal experiences. If you would like this detailed how-to guide,CLICK HERE.
As always, thank you for checking us out and all your support by liking and sharing.
Supply List with details.
Main Items
3 – 16’x50” cattle/feedlot panels
Form the “hoop” structure Slightly overlapped
May want to cut one rung off end to shorten it so tarp can be stapled wood base easier. Tarps come a little short because the measurements are raw not finished.
5 – 2x4x12 treated
2 – 12′ base sides
2 – Cut 10′ base ends – 2′ extras become door diagonal supports
1 – Cut 43″ for door frame top & cut 2 – 50″ sections for back diagonals
1 – 2x4x10
1 – Cut 2 – 59″ door frame sides
4 – 2x4x8 treated (3 if using 2×2 back upright)
1 – cut into 2′ lengths for corner braces for bottom frame
2 – Rip in half to use for door
Or use 4 2x2x8 furring strips, but should stain them if not treated
Gives 4 2x2x8
1 – cut into 55″ and 31.5″ for side and top of door
1 – cut into 55″ and 31.5″ for side and bottom of door
1 – cut into 31.5 for middle brace on door
1 – (optional) cut 61″ for back upright instead of using a 2×4
1 – Cut 61″ for back upright
75’ – 4’ Chicken wire
50′ for 3 passes over the cattle pannels
20′ for the ends
50’ – 2′ hardware cloth, ¼” mesh
Perimeter of entire house. Critter protection.
20’ – 3’ 2×4 wire fence
Put over ends of coop for K-9 protection
2 ½ – 3′ x 5-7′ scrap for back end weather board to give extra shelter
Should be fairly light
Thin pallet wood, what I used.
Sheet of tin roof
1/4-1/2″ plywood or OSB
12×16′ medium duty tarp, or heavy duty if you prefer. Note the extra gets wrapped around the ends
2 – 3” hinges
2 – bolt latches
1 – handle
1 – large bag of zip ties. Used to fasten all the chicken wire, hardware cloth, fence, and cattle panels together. So you want plenty.
Misc. Hardware
2 – 3” hinges
2 – bolt latches
1 – handle
24 – 3-3.5″ Lag screws. To assemble base, including corner supports
~26 – 3″ deck screws. To assemble door & frame and back upright and diagonals
1/2-3/4″ Staples for staple gun
~32 – 1 3/4″ Galvanized Fence staples. To attach the cattle panels to the base and anchor the door and back upright.
Fasteners to attach the back weather break that won’t penetrate the 2×4 it’s going into.
1 1/4 – 1 1/2 16GA staples (pneumatic stapler)
1 1/2 – 1 3/4″ screw (Better than hand nails)
3d-4d nail (d=penny)
12’x16′ medium or heavy duty tarp.
Optional Apron
Ends
25’ – 2′ ¼” hardware cloth
Will actually use approximately 12′, 1′ overlap on the ends.
2 – 1 1/4″ x 10′ PVC pipe
For front and rear aprons
Sides
25’ – 2′ ¼” hardware cloth (Can us e leftover from front and back apron if only 12′ was used for ends)
Will use approximately 13-14′. Thirteen feet will give a 6″ overlap of the front and back apron while using just 1- 25′ roll of hardware cloth.
3 – 1 1/4″ x 10′ PVC pipe
2 – 1 1/4 PVC coupling
How I build the chicken tractors.
Start with the 10×12′ frame. The 10′ end pieces should be raised about an inch to help pull the tractor over clumps of grass.
Add diagonal corner braces.
Hoop 3 sections of cattle panels. They will overlap slightly. Nail them to the base and wire tie hoop sections together
Assemble the door.
Cut the door frame and attach to base and hoop with screws and fence nails.
Cut and assemble the door. I wait to attach it after I’ve stapled the chicken wire to the door.
Put in rear vertical attaching the top to the hoop with fence nails. Attach the diagonal supports.
Add your end material for additional shelter. Note: This side of the tractor will go to the most windward side, west for me. The upper section is just covered by the tarp and can be raised for additional air flow. (don’t attach tarp yet)
Cover the hoop with chicken wire, 3 passes of 4′. Overlap slightly. Staple to wood frame and zip tie together and to the hoop. I use a pneumatic staple gun with 5/8 staples, but a hand stapler should work fine, especially if you use a hammer afterwards to ensure they are tight.
Note: If you don’t have a continuous 75′, such as two rolls of 50′ and 25′, plan it out first. Cover the hoop, then back. Save the front (door end) for last as it uses 3 smaller pieces.
Cover the back and front sections and door with chicken wire.
Note: the bottom 2′ will be hardware cloth and the upper section will be chicken wire.
If you purchased 75′ you should be able to piece together the entire door and sides if you prefer. I do the front and rear end across bottom with hardware cloth, then the piece in the tops with the chicken wire.
Surround the perimeter with 2′ hardware cloth. I added this to stop predators from reaching in through the chicken wire and grabbing birds sleeping near the edge.
Cover the back bottom 2′ that isn’t protected by your end material with Hardware cloth. Optionally you can cover the entire back for extra protection depending on what back end material you used.
Start from the back and move to the front.
Note: If you don’t have 50′ continuous role, plan you’re cuts accordingly. IE, for 2 25′ roles, start in the back and wrap up to the door using one role for each side. Then do the door.
Add 2×4 fencing to ends. This is added for K-9/coyote protection. Three foot doesn’t make it impossible for a K-9 to get over it, but that height with the chicken wire too makes for pretty good protection. So far we’ve survived 2 K-9 attacks.
Note: Use a type/size predators cannot force through. I use 2×4 3′ 14 gauge welded wire.
Attach door with hinges and add latches and handle.
Cover 2/3 of the hoop with the tarp, wrap extra around back. Staple the tarp to the wood base and wire tie the eyelets to the hoop.
Note: My medium duty tarps last one season. I remove and re-add each season.
BONUS: Add an apron to the front and back for added protection. You can also do the sides.
Staple 12-14′ of 2′ hardware cloth to the front and back base, leaving 1-2′ of overlap past the tractor. I try to leave it a little loose so it has a little “hinge” to it. I don’t know that it’s required.
Wire tie a PVC pipe to opposite end of the hardware cloth for weight.
Note: If you cut the PVC end of the hardware cloth and bend the points down, it’s more of a deterrent for critters that might burrow under.
May seems far away, but we’ve already finished our planning and scheduling for the year. Now is time to open up the CSA orders.
Our CSA is now open.
CSA orders are available now until all the slots are full or May 1st, whichever comes first. We’re happy to announce that our prices are staying the same again this year; no price increases. However, we have made some minor changes in the scheduling.
We’ll be doing one larger batch of chickens in the spring instead of the two smaller spring & fall batches as we did last year. This mean only one pickup day for CSA orders. Based on last year’s pick-up schedules this should work out well and it helps us give you the best prices by keeping our costs down. If this does impact you, please provide us your feedback.
One spring batch means you have 2 dates to choose from to pick up your frozen CSA orders, June 2nd or 9th.
You can still choose to pick up your CSA fresh at our homestead, just arrange a time with us in the evening on June 1st or 8th.
Our quality has not changed. We’re still raising the same tasty pastured Non-GMO chickens we’re known for, so don’t miss out and order yours today.
Look for a new face at the farmers market. Joseph is stepping aside to give Samantha the opportunity to work with Matthew raising and selling chickens.
We’ll continue to be at the Seymour and North Vernon during the normal Farmers Markets season. We try to be in Seymour every week and North Vernon at least twice a month, usually the first and 3rd Saturdays, until the chicken runs out.
Our turkeys are ready. These are the same quality poultry as our chickens, affectionately raised on pasture using non-GMO feed. We only raised a handful as a trial, so our supply is limited. Get yours to add a special touch to your special occasion.
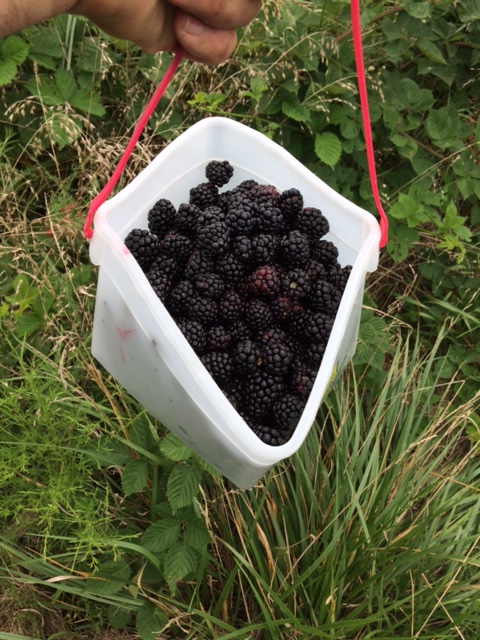
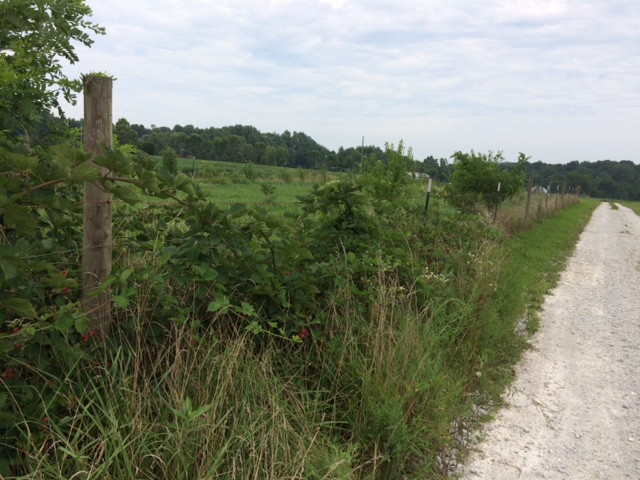
Blackberries are my favorite berry. I love them freshly picked, in pies or cobblers, as jam, and as wine. I probably prefer the taste of strawberries slightly over blackberries, but when you factor in growing and picking, blackberries win as my favorite.
Blackberries are aggressive and will take over whatever area you plant them in, crowding out the weeds. They love and fruit best in full sun, but adapt to partial to near full shade. They also do not seem to be picky about the soil. This makes them easy to grow and is what edges them above strawberries.
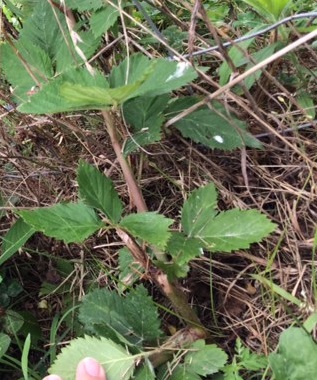
Nearly every place a vine touches the ground, it makes a new plant. This picture is where a new plant started from the end of a vine. This means that you can start out with a few plants and in a few years have whole row and in a few more be nearly overrun by the things and start giving them away to friends and family. This is how I got my start, from a friend, who got his start from his parents, who got theirs from a coworker, and so on.
The ones I grow are an improved thorn-less variety. I do not know the actual name, but I don’t think there are that many different ones out there. Not only are they easier to pick without the thorns, but the berries are much larger than your wild berries. We have both these and wild berries on the property.
Another thing they are good for is pest control for grapes. Planting blackberries in proximity to grapes is a natural way to reduce bugs that would eat your grapes. Growers have noted that the blackberries attract the bugs first and are hearty enough that the pest are no real threat. This gives the predator bugs time to hatch and start eating the bad bugs and keep them off your grape plants.
I’m very happy to finally have a good row growing again; I’ve missed them since we moved. I put this section of the fence up first just so I could get a start on the berries. This picture shows the end of my current 50′ row of blackberries. Eventually they will continue on down whole fence, except for a few grape plants on either end. That’ll be about 150′ worth of blackberries, yum.
In fall of 2014 I decided I wanted to raise some dual-purpose chickens. My focus is on a breed that lays good eggs which can be incubated to raise “panfry” broilers, pre-Cornish-Cross size meat birds. So how about an update on how I move the coop.
I tried to keep the size of the coop minimal so that it could be easily moved. It’s still heavy and challenging to move. My initial thought was to add permanent retractable wheels to one end and add some sort of a trailer type tongue to the other end for lifting an pulling. Due to the weight, the tongue never happened. Instead I still used the retractable wheels, but also put a sledge under the opposite “tongue” end and pulled it like a sled.
This wasn’t optimal. The coop was too heavy for the retracting mechanism I made for the wheels. It was also hard to lift the coop to put the sledge under the other end to drag it with. Additionally, in the spring I had to use the tractor to move it because the garden tractor would get stuck, #1 The Coop.
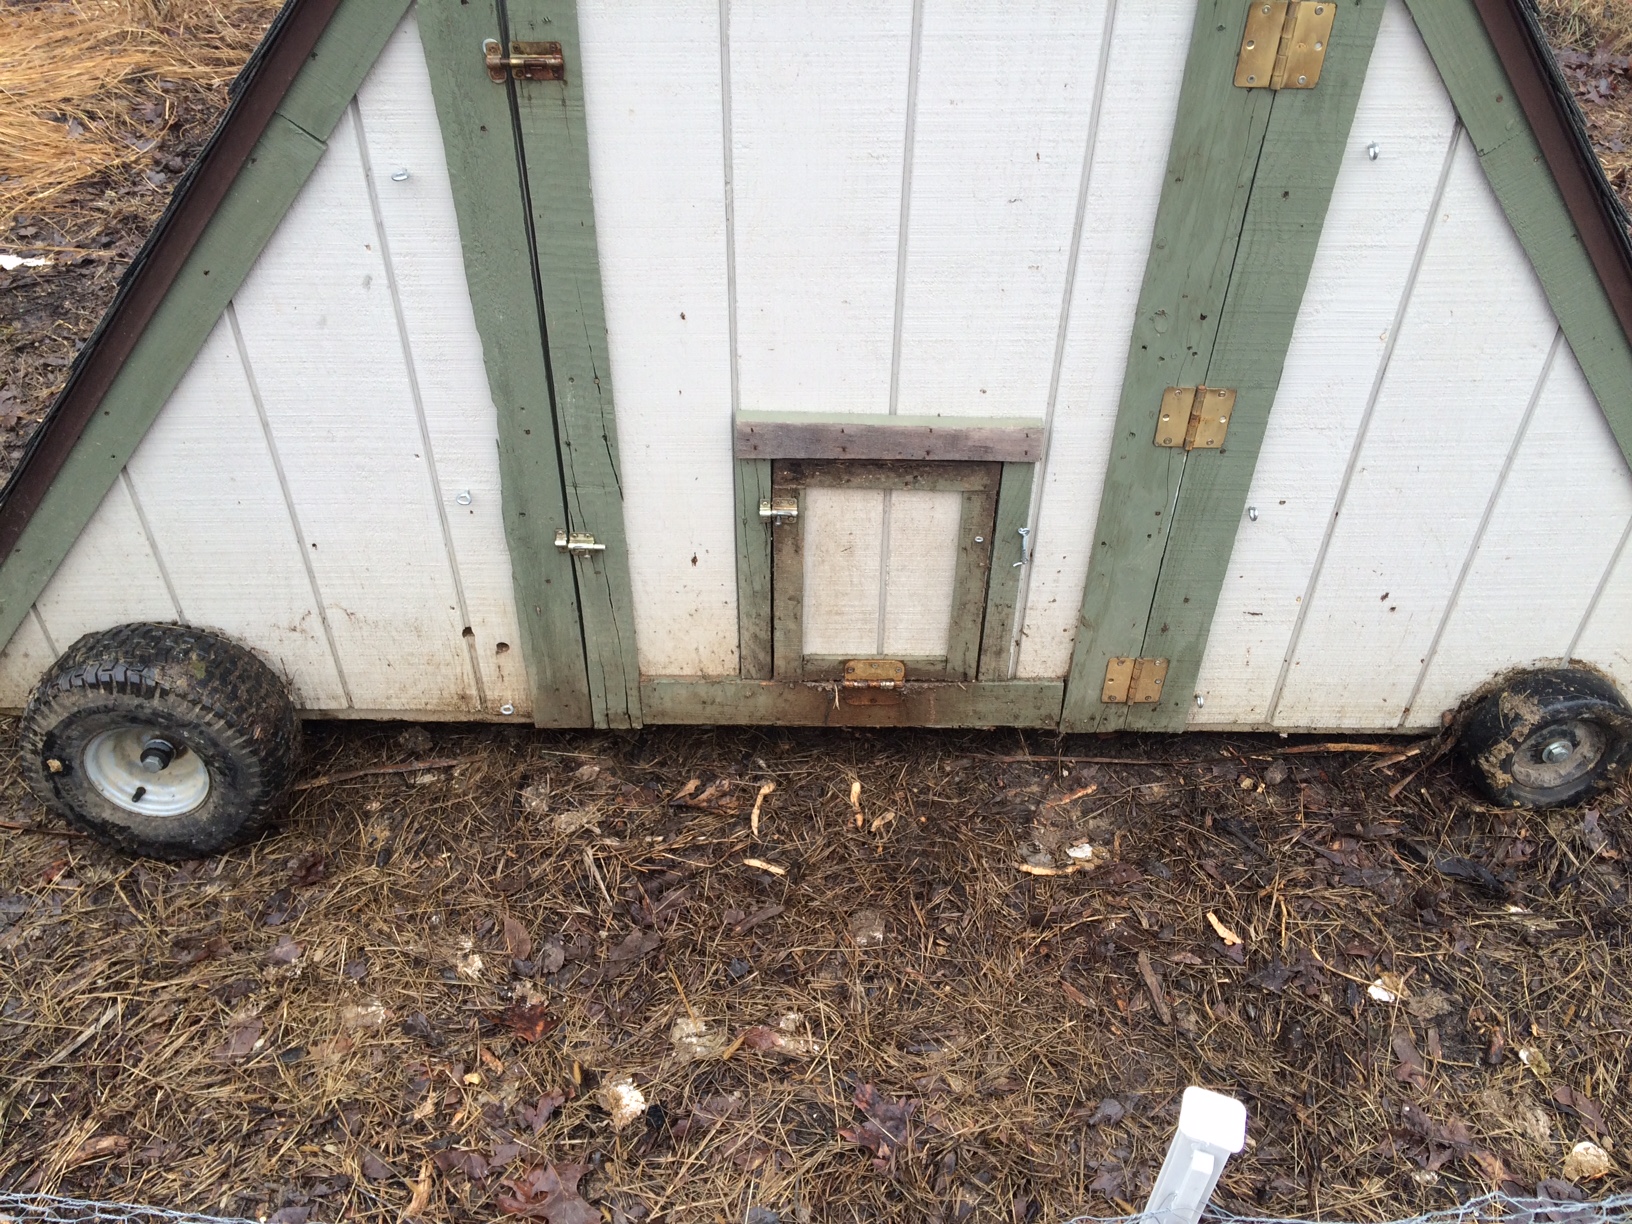
So I scrapped the contraption I made for the extendable wheels and decided to use temporarily attached wheels instead. I scavenged two more wheels from the front of a dead riding lawn mower. For axils, I use 8″ bolts that are the same diameter as the original wheel axils. I drilled holes through the coop’s 4×4 bottom frame and just slide the wheels and bolds right on. I added some spacers between the wheel and wood to prevent rubbing.
This works well. Our winter area can get mucky, as you can probably tell by the picture to the right; however, the wheels still allow us to pull/push the coop by hand. A small scrap piece of chain added to one end helps us to pull or allows us to use the garden tractor for longer distance hauls.
The main downside of this method is that it requires at least two people to tip the coop and put the wheels on. You could use a lever or jack to raise each side, but since I have two boys, it takes just a few minutes to tip the coop each way and add the wheels.
 We recycle at our house and in the past have reused our plastic bags for Brothers M. Poultry. With the increasing awareness of waste plastic polluting the environment, we’re switching to paper bags made from recycled material. They look nice and are better for the environment. Get one free with every chicken purchase.